Generating Client Keys

Contents
The next step of VouchCloud implementation is to generate the client keys for the machines whose machine logs has been generated and collected. Here we will discuss all the steps necessary to generated client keys. This step is done only on the "Server" where Vouch is installed.
Step |
Description |
Image |
||
1 |
The Entry Point.
Select <Vouch Clients in Cloud> from <Manage> option of <Main Menu> |
|
||
2 |
Provide Vouch Admin password.
Note that this and other VouchCloud related modules will always require Vouch Admin password. |
|
||
3 |
A blank form is only presented when there is no record entered yet.
This holds good for all modules in Vouch.
Select <Add> to start data-entry process. |
|


Step |
Description |
Image |
||
1 |
Provide a key name which clearly identifies the machine to which it belongs. In our documentation purposes, we had collected a machine log by name "REGISTER-1", so it is appropriate that you enter the same name here also to generate the corresponding key. The same name for the log and generated key will always ensure that you are not making any mistakes.
A key can be two types, <Open> or <Machine> bound. Open key can be used from any machine. Vouch recommends that you never create an <OPEN> key unless there is a compelling reason to do so. |
|
||
2 |
Select the received machine log. Better way is to keep all machine logs in {drive}:/creative.acp/vouch/logs folder which is created when Vouch is installed on the server. |
|
||
3 |
You can bind Vouch users to a machine, or, even with an <OPEN> key. In certain organizational setups it is almost mandatory to bind certain users who can log-in from a certain machine only. For example, where concept of "Cash Registers" is employed; and only one user is allowed to handle cash transactions from that machine, this feature will come handy. |
|
||
4 |
If opted "Yes" to bind users with a key, a list of all Vouch users will be presented for selection.
You can use <ENTER> to select/deselect a user. When finished, press CTRL+ENTER. |
|
||
5 |
Use <ENTER> for selection/de-selection and <CTRL+ENTER> to finish. |
|
||
6 |
After all fields have been completed, you will be asked to save the record permanently. Select <Save>. |
|
||
7 |
And this is how a completed entry to generate a client machine key will look like. |
|


Step |
Description |
Image |
||
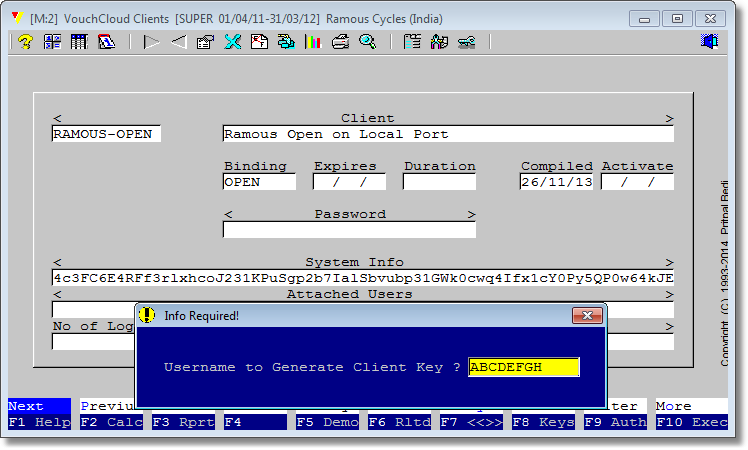
1 |
After feeding all client logs, one entry for each client or group of clients if a key is not supposed to be machine-bound, you have to press F8. |
|
||
|
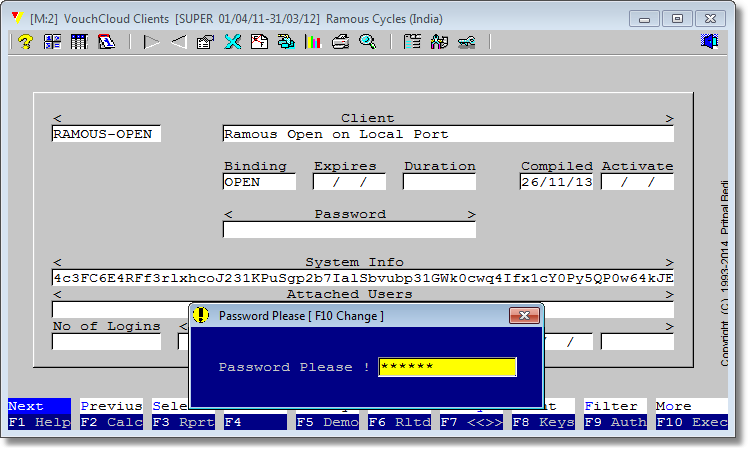
A username and password is requested to carry this operation successfully. Note that F8 password is supplied with Vouch license and cannot be re-assigned. Vouch recommends that this operation be carried out by top-management only. In no case usernames/passwords for F8 and F9 be shared with anybody except the authorized persons.
|
|
||
|
Provide the password as provided by Vouch. |
|
||
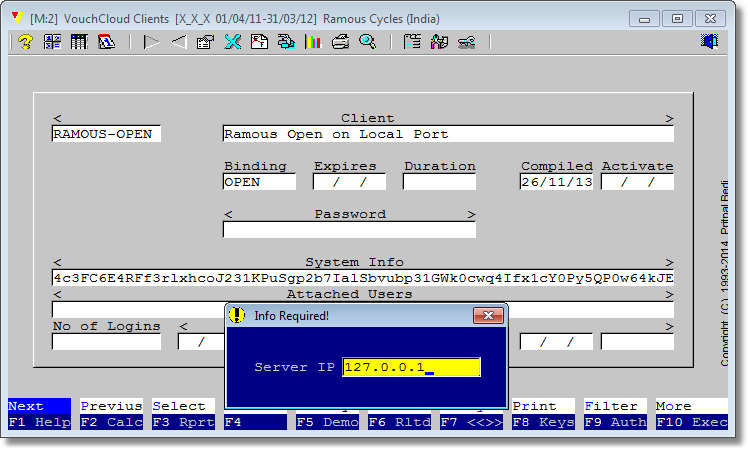
2 |
Server IP is requested. This IP must have the internet visibility. OR if server is installed on intranet, the the visibility within that intranet. For help purposes, localhost 127.0.0.1 is used. Port number 6030 on the server should be allowed to be seen by VouchSrv.exe. Make sure that you configure the Windows server and/or any firewall accordingly.
The server IP is the prime binding factor which control the access to this server and Vouch data. This information cannot be shared by any two VouchCloud installations. Client keys are also bound to this server only. |
|
||
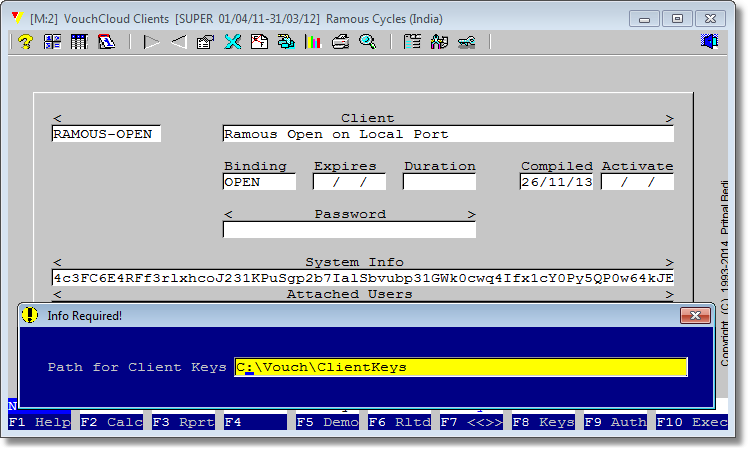
3 |
Vouch requests for the path where client keys will be deposited. Make sure this path exists. Vouch attempts to create folders as per this path if not exist but it is always a better practice to provide one which already exists. |
|
||
4 |
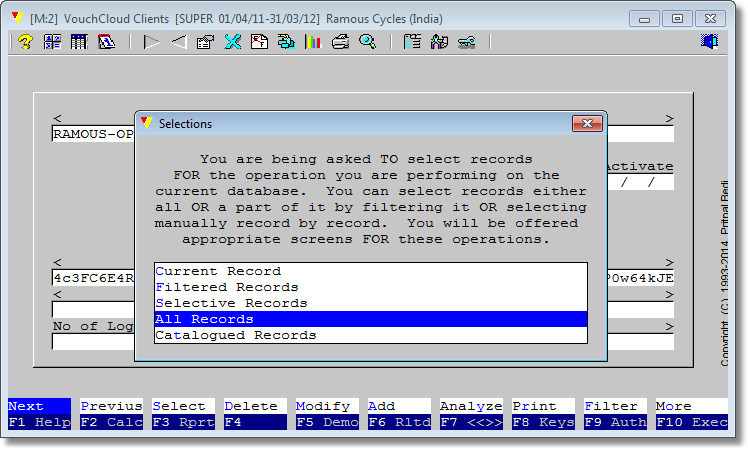
Vouch is presenting options to select the clients for key generation. Select <All Records> just to avoid other steps. |
|
||
5 |
Vouch is requesting to order of key generation. Ignore it and just press ENTER. It is Vouch's internal mechanism to select records. |
|
||
6 |
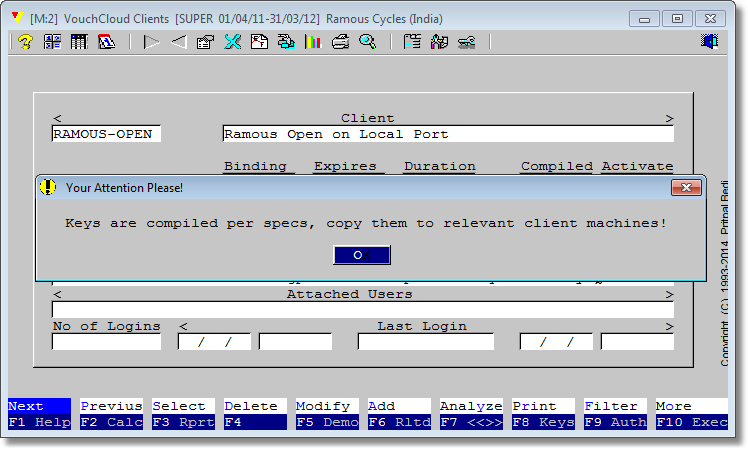
Vouch is informing that keys have been generated in provided path and now those have to be transferred to client machine. |
|
||
7 |
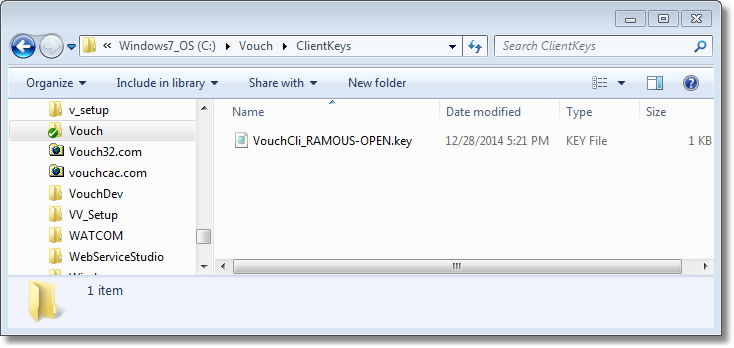
Just to make sure keys have actually been generated, here is the explorer view corresponding to the path we provided to Vouch. |
|
 key(s).")

NEXT: Upping VouchCloud Server